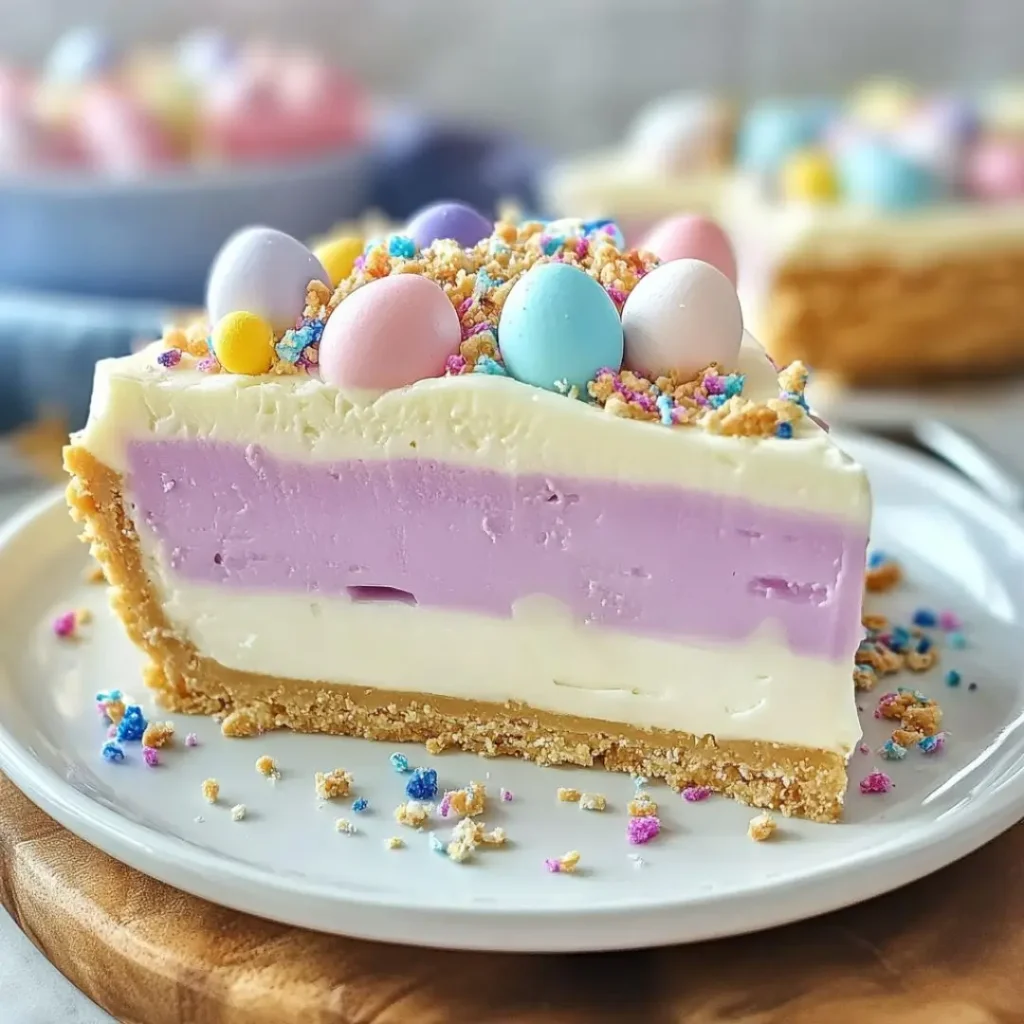
Easter is the perfect time for pastel hues, sweet indulgences, and joyful gatherings around the table. If you’re searching for a festive, hassle-free dessert that’s as stunning as it is delicious, look no further than this Pink Easter Jell-O Pie. With its dreamy layers of fruity, citrusy flavors and a creamy, no-bake cheesecake-like filling, this pie is guaranteed to steal the show at your springtime celebrations. And if you’re craving another whimsical treat, don’t miss out on the Easter Dirt Cake Casserole Recipe a fun and irresistible dessert that’s sure to delight kids and adults alike!
Why You’ll Love This Pink Easter Jell-O Pie
- No-bake magic – No need to turn on the oven, making it perfect for warmer weather.
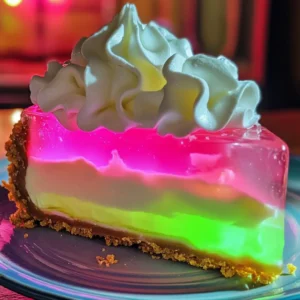
- Beautiful pastel layers – A stunning dessert that looks like spring in a pie dish.
- Kid-friendly & fun – A great recipe to make with little helpers who love mixing Jell-O.
- Light and refreshing – The perfect balance of creamy and fruity flavors.
How to Make Pink Easter Jell-O Pie
Step 1: Prep the Graham Cracker Crust
You can use a pre-made graham cracker crust for convenience, or if you’re feeling extra creative, try making your own with crushed graham crackers, a bit of melted butter, and sugar. Either way, let’s get to the fun part!
Step 2: Make the Jell-O Layers
- In separate bowls, dissolve each Jell-O flavor (lemon, berry blue, and grape) in 1 cup of boiling water.
- Stir until fully dissolved, then add 1 cup of cold water to each bowl.
- Allow each Jell-O mixture to cool slightly before proceeding.
Step 3: Create the Cheesecake Filling
- In a mixing bowl, beat cream cheese until smooth.
- Gently fold in whipped topping until the mixture is light and fluffy.
Step 4: Layer It Up!
- Pour the lemon Jell-O into the crust as the first layer and chill until slightly set (about 15 minutes).
- Spread a thin layer of the cheesecake mixture on top.
- Repeat the process with berry blue Jell-O, then another cheesecake layer.
- Follow with the grape Jell-O, finishing with a final cheesecake layer.
- Refrigerate for at least 4 hours or until fully set.
Step 5: Decorate and Serve
- Top with extra whipped cream for a fluffy, cloud-like effect.
- Sprinkle on pastel sprinkles for that extra Easter touch.
- Garnish with small candy eggs to make it look like an Easter nest.
Pro Tips for the Perfect Jell-O Pie
- Patience is key – Let each layer set before adding the next to avoid a messy mix of colors.
- Use a clear pie dish – If you want to show off the beautiful layers, a glass pie dish is the way to go.
- Keep it chilled – This pie is best served straight from the fridge for a refreshing bite.
Can I Make This Ahead of Time?
Absolutely! This Pink Easter Jell-O Pie is a fantastic make-ahead dessert, making your Easter prep even easier. You can prepare it up to 24 hours in advance and store it in the fridge until it’s time to serve. This allows the flavors to meld together beautifully while ensuring the perfect texture. Just wait to add any decorative toppings, like whipped cream or sprinkles, until right before serving so they stay fresh and vibrant.
For the best results, cover the pie with plastic wrap or place it in an airtight container to prevent it from absorbing any fridge odors.
Pink Easter Jell-O Pie
Equipment
- Mixing Bowl
- Whisk
- Refrigerator
Ingredients
Crust
- 1 pre-made graham cracker crust (9-inch)
Jell-O Layers
- 1 (3 oz) box lemon Jell-O
- 1 (3 oz) box berry blue Jell-O
- 1 (3 oz) box grape Jell-O
- 3 cups boiling water (1 cup per Jell-O flavor)
- 3 cups cold water (1 cup per Jell-O flavor)
- 8 oz cream cheese softened
- 1 1/2 cups whipped topping thawed
Decoration
- Extra whipped cream or whipped topping
- Pastel sprinkles
- Small candy eggs
Instructions
- Use a pre-made graham cracker crust or prepare your own by crushing graham crackers and mixing with melted butter.
- Dissolve each Jell-O flavor in 1 cup of boiling water, then add 1 cup of cold water. Let cool slightly.
- In a bowl, beat cream cheese until smooth, then fold in whipped topping until combined.
- Pour the lemon Jell-O into the crust as the first layer and chill for 15 minutes.
- Spread a thin layer of the cheesecake mixture on top of the lemon Jell-O.
- Repeat the process with the berry blue Jell-O and grape Jell-O, alternating with cheesecake layers.
- Refrigerate for at least 4 hours or until fully set.
- Decorate with whipped cream, pastel sprinkles, and small candy eggs before serving.
Notes
How to Store Leftovers
If you’re lucky enough to have leftovers (which doesn’t happen often!), you can store them in the fridge for up to 3 days. Simply cover the pie with plastic wrap or transfer individual slices to an airtight container.
However, this pie doesn’t freeze well due to the delicate texture of the Jell-O and whipped topping. Freezing can cause separation and make the filling watery once thawed. So, it’s best to enjoy your Pink Easter Jell-O Pie fresh from the fridge!
FAQs
What are some other Kraft cheesecake recipes like this?
Kraft has many no-bake cheesecake recipes that use cream cheese and Jell-O, making them great alternatives for easy desserts.
Can I add a peanut butter twist to this pie?
If you love graham cracker peanut butter and jelly flavors, you can drizzle melted peanut butter on top for a fun twist.
Is There a Way to Make This Dessert Vegetarian?
Yes! Traditional Jell-O contains gelatin, which is derived from animal sources. To make this Pink Easter Jell-O Pie vegetarian, simply swap the regular Jell-O for a plant-based gelatin alternative, such as agar-agar or a vegan-friendly Jell-O brand. Keep in mind that agar-agar sets differently, so follow the package instructions carefully.
Can I Make This Pie Without Cream Cheese?
Definitely! If you prefer a lighter or dairy-free version, you can skip the cream cheese and substitute it with extra whipped topping or a dairy-free alternative like coconut cream. This will give you a slightly different texture, but the pie will still be deliciously creamy and smooth.
My Layers Are Mixing Together. What Am I Doing Wrong?
If your layers aren’t setting properly and start to blend, it’s likely due to pouring the next layer too soon. Always let each layer set completely in the fridge before adding the next one. Also, try gently spooning the new layer over the previous one instead of pouring it all at once to avoid disturbing the layers.
How Far in Advance Can I Make This Easter Jell-O Pie?
You can make this pie up to 24 hours in advance for the best texture and flavor. Just be sure to cover it tightly and store it in the fridge until you’re ready to serve. Add any toppings right before serving to keep them fresh.
Can I Use Different Jell-O Flavors for This Easter Pie?
Absolutely! Feel free to get creative with different Jell-O flavors to match your favorite colors or taste preferences. Strawberry, raspberry, or even lemon can be great choices for a fun twist on this festive dessert. Just make sure the flavors complement each other if you’re layering different ones!
Final Thoughts
This Pink Easter Jell-O Pie is the perfect festive treat to brighten up your Easter celebration! With its vibrant color and refreshing flavor, it’s a guaranteed crowd-pleaser for family gatherings, friendly get-togethers, or simply indulging your love for Jell-O (because who doesn’t?). Plus, it’s as fun to make as it is to eat! So, grab your mixing bowls, embrace the joy of citrus well drilling, and let’s whip up a dessert that’s as sweet as the season itself!

Thank You For This Recipe Easter Cake is yemmy