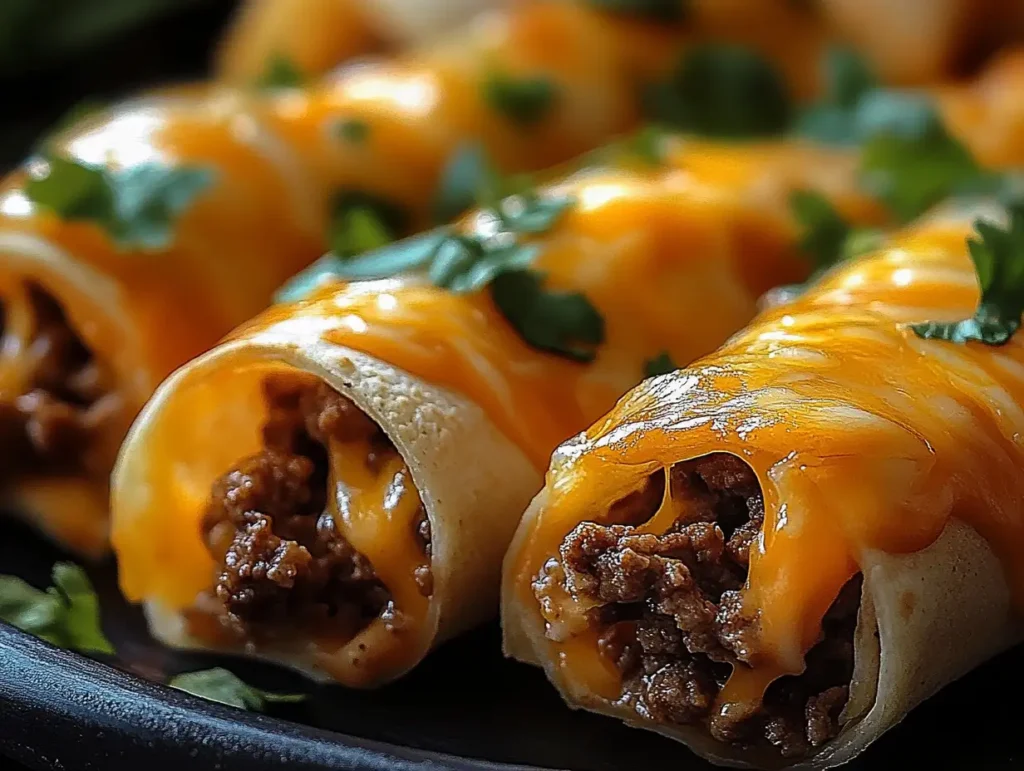
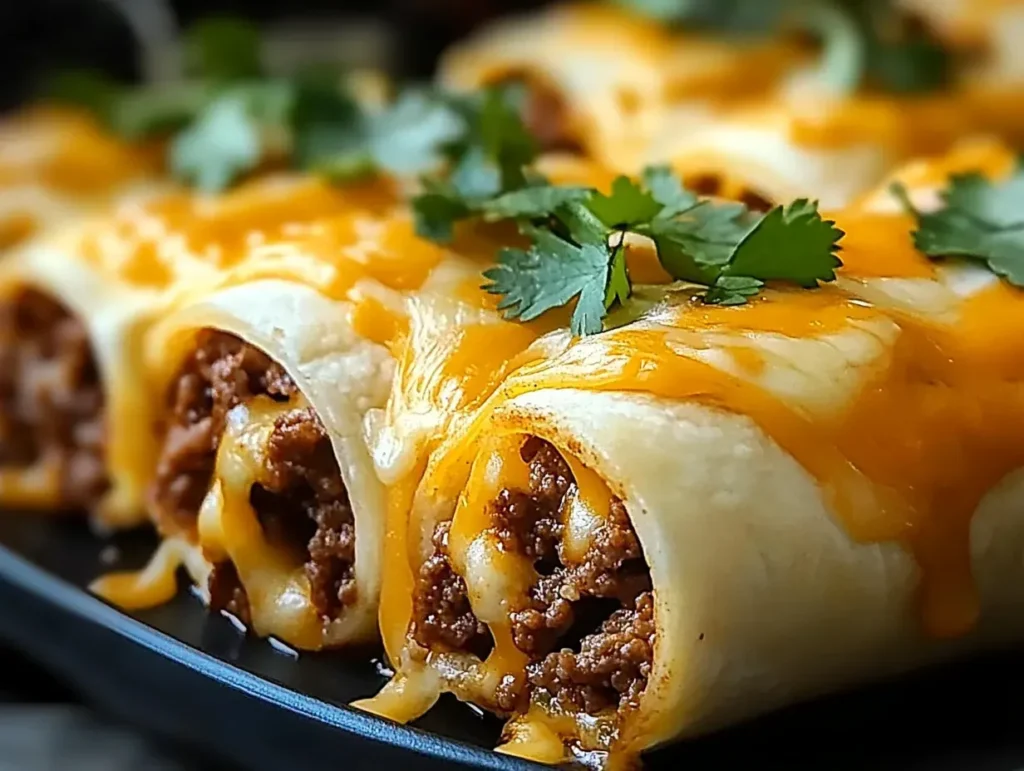
Craving Cheesy Beefy Roll-Ups? These crispy, melty, beefy delights are the ultimate comfort food! Each bite is packed with savory ground beef, gooey cheddar cheese, and a perfectly crispy tortilla, making them perfect for a quick dinner, meal prep, or a family-friendly meal.
But here’s the best part they’re super easy to customize! Want extra crunch? Add crushed tortilla chips. Like it spicy? Toss in some jalapeños and hot sauce. Need a low-carb version? Use lettuce wraps or low-carb tortillas. No matter how you make them, Cheesy Beefy Roll-Ups are always a crowd-pleaser!
Table of Contents
Why You’ll Love These Cheesy Beefy Roll-Ups
✔ Quick & Easy – Perfect for busy weeknights!
✔ Family & Kid-Friendly – Even picky eaters love them.
✔ Customizable – Adjust the spice, cheese, or fillings to your liking.
✔ Crispy on the Outside, Melty on the Inside – The perfect balance of texture and flavor.
✔ Great for Meal Prep – Make them ahead, refrigerate, or freeze for later.
Ingredients for the Ultimate Savory Filling
To make the best Cheesy Beefy Roll-Ups, you’ll need just a few simple ingredients:
| Ingredient | Amount |
|---|---|
| Ground beef | 1 lb |
| Taco seasoning | 1 packet |
| Cheddar cheese | 1 cup, shredded |
| Monterey Jack cheese | 1 cup, shredded |
| Flour tortillas | 8 medium-sized |
| Sour cream | ½ cup |
| Butter | 2 tbsp |
| Oil (for frying) | 2 tbsp |
| Salsa | ½ cup |
| Guacamole | ½ cup |
| Ranch dressing | ¼ cup |
| Jalapeños (optional) | ¼ cup, sliced |
| Crushed tortilla chips (optional) | ¼ cup |
| Black beans (optional) | ½ cup |
| Sautéed veggies (optional) | ½ cup |
👉 Pro Tip: Want to go low-carb? Swap out the flour tortillas for lettuce wraps or low-carb tortillas.
Garlic Parmesan Cheeseburger Bombs – Cheesy beef-stuffed biscuits with a garlicky parmesan crust.
Choosing the Best Ingredients

1. The Right Ground Beef for Maximum Flavor
The star of these roll-ups? Juicy, seasoned ground beef! For the best flavor, use 80/20 ground beef this has the perfect balance of fat and meat, making the filling extra juicy and flavorful.
Want a healthier option? Try ground turkey or chicken instead!
2. The Perfect Cheese Combo: Cheddar & Monterey Jack
You want your roll-ups to have that gooey, stretchy, melty cheese pull, right? That’s why we’re using cheddar cheese (for sharp, bold flavor) and Monterey Jack cheese (for that smooth melt). Cream cheese can also be added for an extra creamy texture!
3. Flour Tortillas vs. Low-Carb Tortillas
Flour tortillas are classic, but if you want a healthier option, go for low-carb tortillas. Lettuce wraps are a great gluten-free alternative too!
Cheesy Mashed Potato Puffs – Crispy, cheesy bites made from mashed potatoes.
How to Make Cheesy Beefy Roll-Ups – Step-by-Step Guide
Step 1: Cook the Savory Ground Beef
1️⃣ Heat a skillet over medium heat, then add oil.
2️⃣ Brown the ground beef, breaking it up with a spatula.
3️⃣ Stir in taco seasoning and a little water (per package instructions).
4️⃣ Cook for another 2-3 minutes until the beef is fully coated and flavorful.
👉 Pro Tip: For extra flavor, toss in some Rotel tomatoes or a pinch of cayenne pepper.
Step 2: Assemble the Roll-Ups
1️⃣ Lay a flour tortilla flat.
2️⃣ Spread a thin layer of sour cream.
3️⃣ Add a scoop of ground beef on top.
4️⃣ Sprinkle generously with cheddar and Monterey Jack cheese.
5️⃣ Optional: Add jalapeños, sautéed veggies, or black beans for extra texture.
6️⃣ Roll the tortilla tightly like a burrito, folding in the sides as you go.
Step 3: Cooking Methods – Choose Your Favorite!
✔ Skillet Cooking (For a Crispy, Golden-Brown Finish)
1️⃣ Heat butter in a pan over medium heat.
2️⃣ Place roll-ups seam-side down and cook for 2-3 minutes per side.
3️⃣ Flip until crispy and golden-brown.
✔ Oven-Baked (For a Lighter Version)
1️⃣ Preheat oven to 375°F (190°C).
2️⃣ Place roll-ups on a baking sheet, brush with melted butter.
3️⃣ Bake for 12-15 minutes or until crispy.
✔ Air Fryer (Super Crispy in Minutes!)
1️⃣ Preheat air fryer to 375°F (190°C).
2️⃣ Spray roll-ups lightly with oil.
3️⃣ Air fry for 8-10 minutes, flipping halfway.
👉 Pro Tip: Want EXTRA crunch? Coat the outside with crushed tortilla chips before cooking!
Million Dollar Chicken Casserole – Creamy, cheesy chicken casserole with a crispy topping.
Tips for Achieving the Perfect Crispy Tortilla
✔ Use Butter or Oil – This gives you that golden, crispy shell.
✔ Cook on Medium Heat – Too hot, and they’ll burn before the cheese melts!
✔ Don’t Overstuff – Too much filling = messy roll-ups that won’t hold together.
✔ Let Them Rest – Give them 1-2 minutes after cooking so the cheese can set.
Delicious Variations to Customize Your Roll-Ups
Spicy Kick
Add jalapeños, cayenne pepper, or hot sauce for extra heat!
Extra Crunchy
Roll them in crushed tortilla chips before cooking.
Low-Carb & Gluten-Free
Swap flour tortillas for lettuce wraps or low-carb tortillas.
Creamy & Cheesy
Add cream cheese or queso inside for an extra melty texture.
The Best Dipping Sauces for Cheesy Beefy Roll-Ups
Dipping sauces take Cheesy Beefy Roll-Ups to the next level. Whether you like them creamy, spicy, or tangy, there’s a perfect sauce for everyone.
Classic Pairings
✔ Salsa – A fresh and zesty dip made with tomatoes, onions, and cilantro.
✔ Guacamole – Creamy, rich, and full of avocado goodness.
✔ Sour Cream – The coolest dip for balancing out the spices.
Unique Twists
Hot Sauce – If you love heat, add a drizzle of your favorite hot sauce!
Queso – Because more melty cheese = more happiness.
Ranch Dressing – An unexpected but deliciously creamy option.
Pro Tip: Mix ranch with hot sauce for a spicy, tangy combo!
Stuffed Shells with Meat and Ricotta – Pasta shells filled with ricotta and meat, baked in marinara.
What to Serve with Cheesy Beefy Roll-Ups
These roll-ups are amazing on their own, but pairing them with the right sides and toppings makes for a full meal!
Best Side Dishes
Mexican Rice – The perfect flavorful side.
Refried Beans – Creamy, rich, and packed with protein.
Chopped Cilantro & Green Onions – For extra freshness.
Toppings That Elevate the Dish
Cayenne Pepper – For a spicy kick.
Rotel Tomatoes – Adds a juicy, tangy flavor.
Extra Cheese – Because you can never have too much cheese!
Common Problems & How to Fix Them
Making Cheesy Beefy Roll-Ups is easy, but sometimes things can go wrong. No worries—we’ve got simple fixes for every problem!
Why Are My Roll-Ups Falling Apart?
Solution: Don’t overfill! Too much beef or cheese makes them hard to roll. Use melted cheese as “glue” to keep everything in place.
Why Are My Tortillas Soggy?
Solution: If you don’t cook them long enough, they’ll be soft instead of crispy. Make sure to sear them in a skillet or bake/air fry them until golden-brown.
Too Spicy?
Solution: Add extra sour cream, ranch dressing, or cream cheese to balance the heat.
Weight Watchers Dinner Recipes – Tasty, healthy meals to stay on track.
How to Store & Reheat Cheesy Beefy Roll-Ups
Made a big batch? No problem! Here’s how to store and reheat them so they stay crispy and delicious.
Refrigeration: How Long Do They Last?
✔ Store in an airtight container in the fridge for up to 3 days.
Freezing: The Ultimate Freezer-Friendly Meal
✔ Wrap each roll-up in foil or plastic wrap, then store in a ziplock bag.
✔ Freeze for up to 2 months.
The Best Ways to Reheat
Skillet: Heat on medium with a little butter for 3-4 minutes per side.
Oven: Bake at 375°F (190°C) for 10-12 minutes.
Air Fryer: Crisp them up at 375°F for 5-7 minutes.
Pro Tip: Avoid microwaving! It makes the tortillas soggy.
Mini Cheesy Beefy Roll-Ups: The Perfect Party Snack
Hosting a party? Make mini roll-ups! They’re bite-sized, crispy, and perfect for dipping.
How to Make Mini Roll-Ups
1️⃣ Use small tortillas (or cut large ones in half).
2️⃣ Add less filling (so they stay rolled up).
3️⃣ Cook using the skillet, oven, or air fryer.
4️⃣ Serve with all the best dipping sauces!
Frequently Asked Questions (FAQ) – Cheesy Beefy Roll-Ups
Can I make these roll-ups ahead of time?
Yes! Cheesy Beefy Roll-Ups are great for meal prep. You can assemble them ahead of time, store them in the fridge for up to 24 hours, and cook them when ready. For best results, keep them wrapped in plastic wrap or an airtight container to prevent the tortillas from drying out.
What can I serve with these roll-ups?
These crispy, melty roll-ups pair well with a variety of side dishes and dips, including:
- Mexican Rice
- Refried Beans
- Guacamole & Salsa
- Chopped Cilantro & Green Onions
- Ranch Dressing or Queso
Can I freeze the leftovers?
Absolutely! Freezing makes them a great make-ahead meal. Here’s how:
✔ Wrap each roll-up individually in plastic wrap or foil.
✔ Place them in a ziplock bag and freeze for up to 2 months.
✔ Reheat using a skillet, oven, or air fryer for the best crispy texture (avoid microwaving, as it makes them soggy).
How do I prevent the roll-ups from falling apart?
The key to keeping your roll-ups intact and crispy is:
✔ Don’t overfill – Too much filling makes rolling difficult.
✔ Melted cheese = natural glue – It helps hold everything together.
✔ Fold the sides in tightly before rolling.
✔ Cook seam-side down first to seal them properly.
If they’re still coming apart, try using a toothpick while cooking, then remove before serving.
Can I use a different type of cheese?
Of course! While cheddar and Monterey Jack are great for melty goodness, you can experiment with:
Mozzarella – Extra stretchy and mild flavor.
Pepper Jack – Spicy kick with great meltability.
Queso Fresco – Crumbly and mild (best for topping).
Cream Cheese – Adds a creamy, tangy texture inside.
Mix and match to create your ultimate cheesy roll-up!
Final Thoughts: The Perfect Quick Dinner for Families
Cheesy Beefy Roll-Ups are easy, delicious, and endlessly customizable. Whether you make them for a quick dinner, meal prep, or party snack, they’re always a hit.
✔ Kid-friendly?
✔ Make-ahead meal?
✔ Crispy, melty, and full of flavor?
And if you’re looking for the perfect drink pairing, why not try a Blueberry Mojito?
So what are you waiting for? Grab some tortillas, ground beef, and cheese, and start rolling!
Recommend :
- yogurt based drink crossword Recipe

- Why Is Onion Soup Healthy? 7 Surprising Benefits

- White Tea Shot Recipe

- White Chocolate Raspberry Dream Cake

- When did funky pickle pizza close?
- What to serve with a chicken broccoli casserole?


Cheesy Beefy Roll-Ups Recipe
Equipment
- Skillet
- Baking Sheet
- Spatula
Ingredients
- 1 lb ground beef
- 1 cup shredded cheddar cheese
- 4 large tortillas
- ½ teaspoon garlic powder
- ½ teaspoon onion powder
- ½ teaspoon paprika
- ½ teaspoon salt
- ¼ teaspoon black pepper
- 1 tablespoon butter (for cooking)
Instructions
- Preheat oven to 375°F (190°C).
- In a skillet, cook ground beef over medium heat until browned. Drain excess grease.
- Stir in garlic powder, onion powder, paprika, salt, and black pepper. Mix well.
- Divide beef mixture evenly onto tortillas and top with shredded cheese.
- Roll up tortillas tightly and place them on a baking sheet, seam-side down.
- Brush with melted butter and bake for 10-12 minutes or until golden brown.
- Serve warm and enjoy!
Video
Notes
- Use any cheese you like for extra flavor.
- Add salsa or sour cream for dipping.
- Swap beef for chicken or beans for a twist.
You are amazing recipes , can you tell me about similar recipes creamy cheeses please
thank you